A beginners Davinci Resolve comprehensive guide
DaVinci Resolve: A Comprehensive Guide for Beginners

Hello and welcome back to another blog article! Today, we'll explore the incredible world of DaVinci Resolve. As a seasoned video editor, I'm excited to share some helpful hints I've discovered while using this fantastic video editing software.
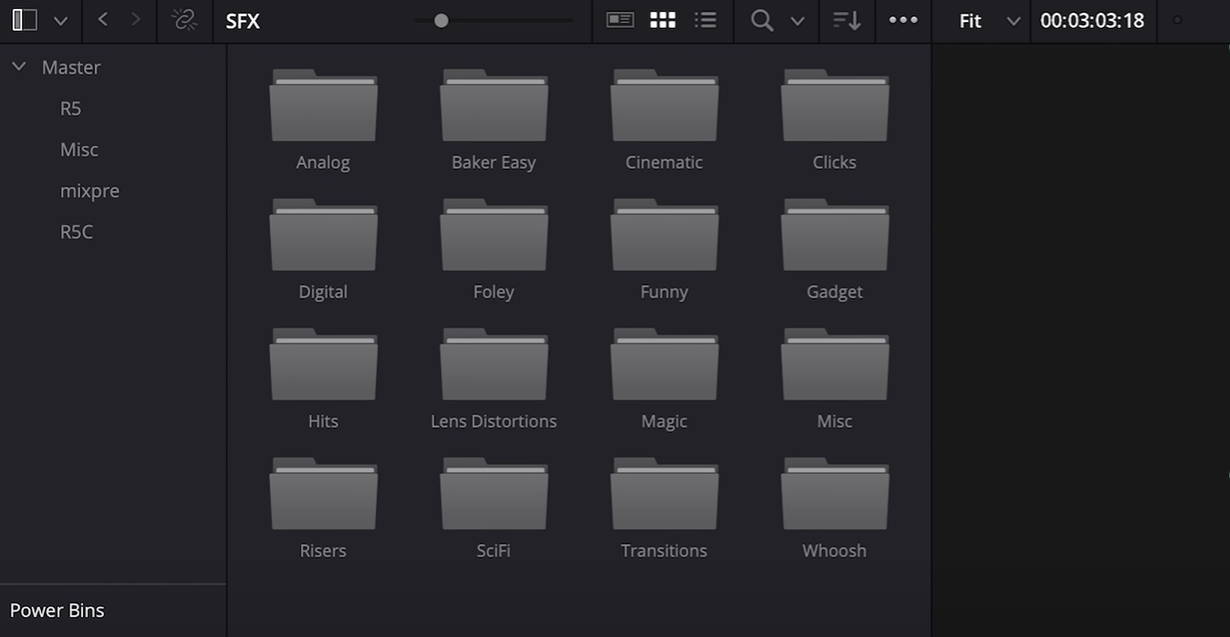
1. Power Bins in DaVinci Resolve
Importing assets for each new project can be time-consuming. Thanks to DaVinci's Power Bins feature, any file you import will be accessible across all your projects. Navigate to your media window, click the three dots in the corner, and select "Show Power Bins." Now, you have a convenient, time-saving tool for your future projects.
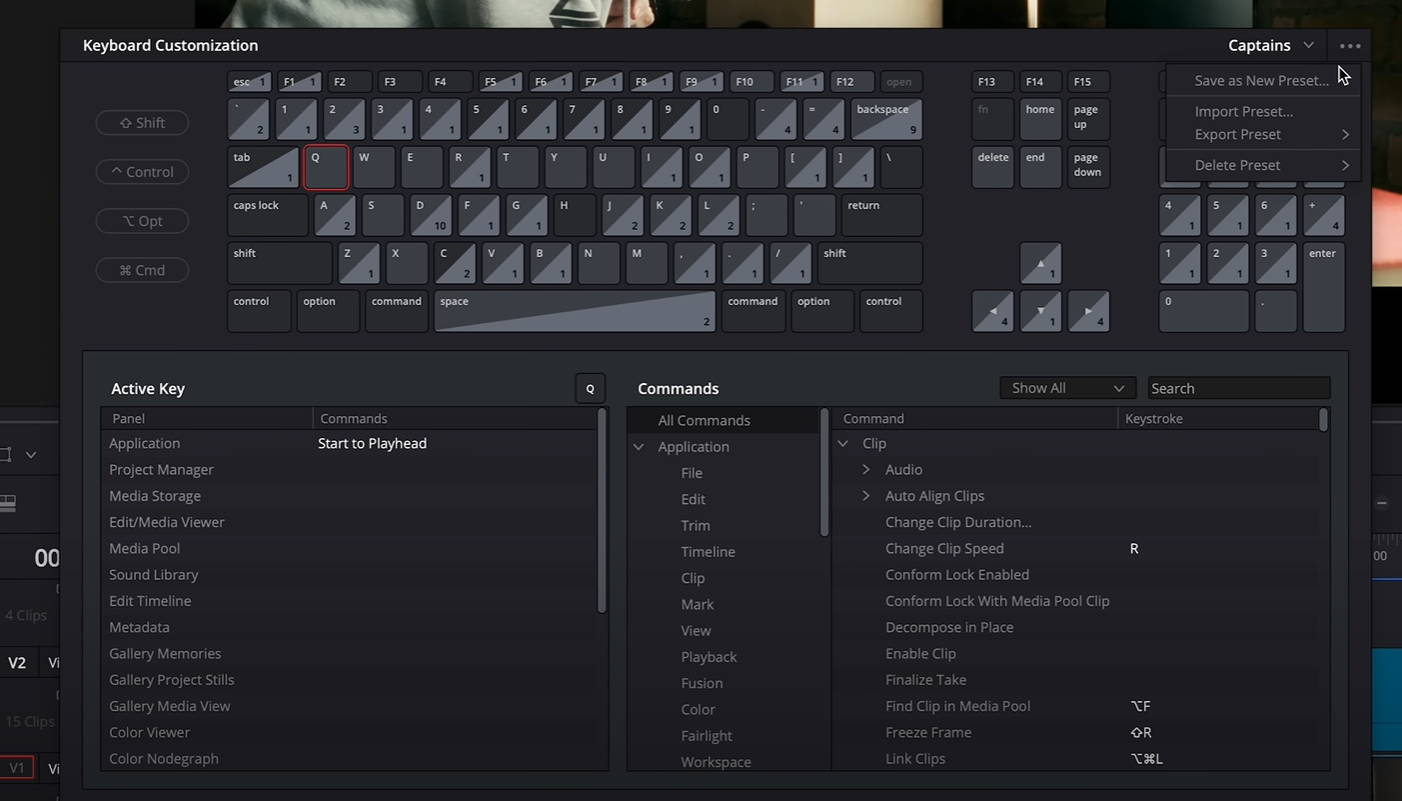
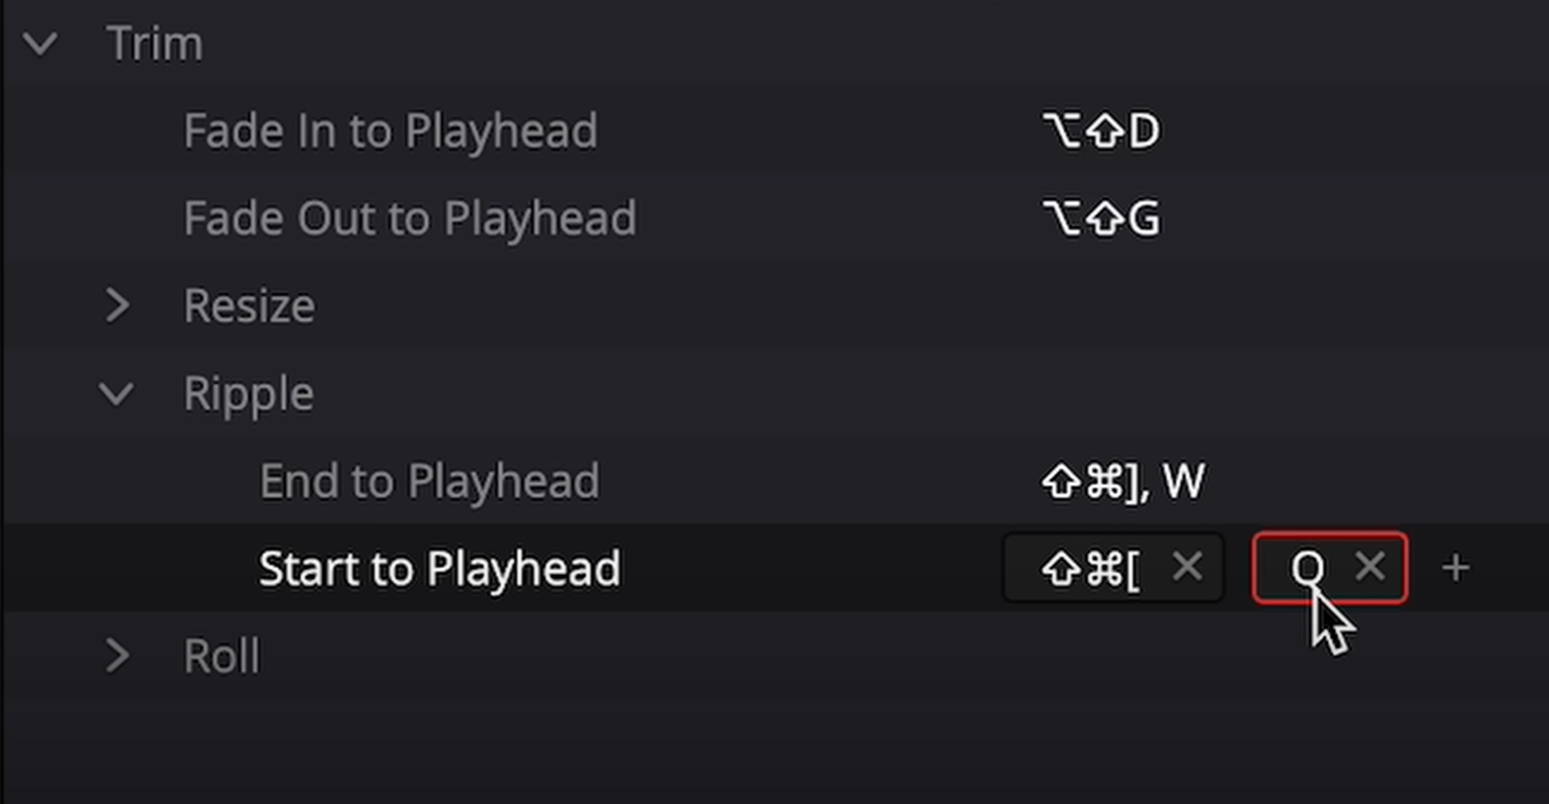
2. Keyboard Customization for Efficient Workflow
Customizing keyboard shortcuts can significantly enhance your editing speed. In DaVinci Resolve, you can set up your most frequently used commands to be within easy reach of your left hand. Go to the top left corner, click on "DaVinci," then "Keyboard Customization." A few helpful shortcuts include 'S' for split clip, 'D' for delete, 'Q' and 'W' for ripple delete, '3' and '4' for swap clips, and 'A' for select all clips forward.
3. Auto Track Selector
DaVinci Resolve's Auto Track Selector ensures that when you're making cuts, selected tracks remain unaffected. This tool is a lifesaver when you need to protect elements like music tracks while editing.
4. Remote Grading
Remote Grading allows you to apply changes to a color grade on one instance of a clip to all instances of that file used in your timeline. Right-click anywhere on your clip track on the color page and select "Use Remote Grades."
5. Modifiers
DaVinci Resolve simplifies the process of applying modifiers to your shots. Whether you need to stabilize shaky footage, correct lens distortion, or apply a slow zoom, modifiers have you covered.
6. Blanking Fill Effect
Creating a blurry background to showcase vertical photos in widescreen format is easy in DaVinci Resolve. Just go to effects, find the Blanking Fill effect, drop it on the clip, and you're good to go.
7. Render Cache
If DaVinci Resolve starts lagging or stuttering, especially after applying some effects, ensure you've pre-rendered your project. Navigate to Playback > Render Cache > Smart, and DaVinci will pre-render the clips that need it.
8. Scene Cut Detection
DaVinci Resolve has a powerful feature called "Scene Cut Detection." This feature can analyze a finished video and detect every cut in the video, breaking it down into individual clips. This is particularly handy if you need to re-grade or re-edit a finished video but don't have the original project file.
9. Compound Clips
Another neat trick in DaVinci Resolve is creating Compound Clips. If you've got a selection of clips that you want to group and treat as one clip, just right-click and select "New Compound Clip." This is a powerful way of decluttering your timeline and managing complex projects.
10. Save and Load Presets
If you find yourself frequently using specific settings or adjustments, you can save these as presets. For instance, if you have a preferred set of color grading adjustments, you can save this as a preset. Simply right-click on the node where you've made the adjustments and click "Save Preset."
